photo home-34.png photo home-34.png photo home-34.png photo home-34.png photo home-34.png photo home-34.png photo home-34.png
Showing posts with label Tuesday Tip. Show all posts

Tuesday, September 1, 2015

My Favorite Beauty Buys


Hello, and welcome to my favorite beauty products edition of Hot Dog it's a Food Blog. Don't worry, I will be back tomorrow with an incredible ice cream recipe, but today as my "Tuesday Tip", I wanted to share with you what you can find in my make-up bag. I get asked a lot about what products I use, so I thought this could be a fun way to let you see another side of me! Here goes:


This lip scrub from LUSH is to die. And it tastes like bubblegum. The 12 year old in me screams with joy every time I use it. Leaves your lips kissably smooth without damaging them.

This lip tint, also from LUSH, was an impulse purchase, but it has been my go-to lip color every day for the past month. It's just enough color that you don't look caked on for work, but also flirty enough for the weekend.

This brow drama gel form Maybelline has been a lifesaver while I am trying to fill out my eyebrows (I was overzealous with the tweezers as a teen). After I line my brows in the morning, this tinted gel holds them in place and keeps my brown brows, well, brown and not shiny in the least.


Gone are the days of using namebrand toothpaste full of chemicals and little plastic beads. We are a household of charcoal toothpaste users, this brand in particular. We don't wake up with bad breath or filmy teeth anymore, and after just 1 tube, our teeth are noticeably whiter. And if you think this is a bunch of bull, I have even had a dentist appointment since I switched, and they applauded my teeth.

Let's talk nails for a second. I am a little bit of a cheapskate when it comes to beauty upkeep (i.e. I went 2 years without a haircut, because my roommate used to cut it for free, then moved to TX, and I just couldn't bring myself to pay $60 to get it cut, because blog/grocery budget trumps hair budget. But hey, it grew like 8 inches over that period of time). So you can understand when I tell you that I rarely ever get manicures. But don't misunderstand me, my nails are always groomed. Because I do them myself! I have been using the same topcoat for years and I swear by it. It is fast drying, thick, and doesn't chip easily, especially important because I type on a keyboard all day long, cook, and wash dishes multiple times a day!


Lastly, I am a snob when it comes to trial-sized beauty products. I have subscriptions to both ipsy and Birchbox. I look forward to my monthly delivers, and you can't beat the $10/month price. You can sing up for ipsy with this link to start receiving your custom glam bag (their beauty quiz allows for a personalized beauty experience, and you can change it as many times as you want). Ipsy comes with an additional makeup bag each month filled with the products, while Birchbox comes in a tissue wrap-filled box, and you sometimes even score a full-sized version of a product.


So what are some of your favorite beauty buys? Tell, tell tell!!

This post was not sponsored, all opinions and purchases are my own. 

Tuesday, August 4, 2015

Tuesday Tip: My Favorite Kitchen Gadgets 2.0

A few months ago I shared with you my top 10 favorite gadgets that I use constantly in my kitchen. Well, time has passe and new gadgets have found their way into my home, and my heart. And I found it was time to share them with you. You could probably guess a couple of them seeing as I have been sharing french macaron and popsicle recipes with you to no end. So here's a little insider's tip to my favorite products in my kitchen right now!

These popsicle molds are the perfect way to spend summer indoors.
We use this coffee bean grinder every morning for the freshest tasting coffee.
Seashell baking shells kick any plated meal up a notch.
This macaron silicon mat is for making macarons, duh.
And what would I do without my food processor?

This post was not sponsored, nor were any products given to me. All purchases and opinions are my own.

Tuesday, July 28, 2015

Tuesday Tip: How to Peel a Kiwi

 Tuesday Tips. Where have you been? To be honest, I kind of 1/2 forgot about Tuesday Tips and 1/2 ran out of valuable tips for you. Until now. Kiwis. We all know how frustrating it can be to try and cut that fuzzy exterior off without losing mass amount of the fruity interior. But don't worry, I got you covered. Grab a knife, a spoon, and ALL the kiwis. Let's have a peeling party!

Tuesday Tip: How to Peel a Kiwi


Start by trimming off the ends of the kiwi with a knife.


Now, take a large spoon and slide the back side of the spoon along the inside of the kiwi skin.


Slowly, turn the kiwi, allowing the spoon to pull the skin away from the entire fruit as you complete the circle.


Carefully push the kiwi fruit out of the skin.


Ta-da!!

Tuesday, March 10, 2015

Tuesday Tip: Top 10 Kitchen Gadgets


Pictured above are my Top 10 kitchen gadgets that I can be seen using on the reg. Some are fancy (see: Ice Cream Maker), and some are extremely inexpensive, but priceless at the same time (see: egg poachers). From top left moving horizontally we have:

Microplane: I love to zest fresh cheese over my pasta and pizza. This does the trick.
Silicone Baking Mat: Your cookies will never stick to you baking sheet ever again.
Egg Poachers: No more messy poached eggs. These make poaching eggs a cinch in just 2 minutes.
Citrus Juicer: I love fresh pressing juice. Arm workout is an added bonus.
Wire Cooling Rack: Useful for, duh, cooling foods. But also for baking bacon in the oven.
Cast Iron Skillet: The manliest tool I own. Sears meat perfectly every time.
KitchenAid Ice Cream Maker Attachment: No explanation needed.
Square Ice Cube Trays: Melts evenly in a glass of scotch.
Box Grater: I love to grate my own cheese, and it comes in a variety of shapes and sizes.
Electric Salt & Pepper Shakers: Freshly ground salt and pepper makes all the difference.

Tuesday, February 10, 2015

Tuesday Tip: Lemon Ice Cubes


 There are two kinds of people in this world. People who like lemon in their water and people who don't. Years ago I worked as a server at a local restaurant and I always made sure to ask before putting a slice of fresh lemon in their water, because the latter types of people were basically insulted when you just assume that's what they wanted. I myself am a lemon lover. So when a girlfriend of mine posted online that she had to harvest her lemon tree and didn't know what to do with them all, I gladly offered to stop by and take some off of her hands. I've been pressing them into my fresh juice in the morning, zesting them into our dinners, and making ice cubes. Yep. Lemon ice cubes. It's the easiest way to always ensure you have fresh lemon juice on hand. Whether you're tossing them into a cocktail, adding more citrus to your lemonade, or just flavoring your water, these lemon ice cubes are a perfect addition to quench your thirst on a sunny day.


To make lemon ice cubes, slice lemon in half, juice into a 2-cup or larger measuring cup. Once all lemons have been juiced, run the juice through a fine mesh colander/sieve into a clean bowl or cup. Fill an ice cube tray with the lemon juice and freeze until solid. Keep in an airtight container or ziplock bag.

Tuesday, October 21, 2014

Tuesday Tip: Proper Food Storage

 You know those times when you spend half of your week's earnings at the grocery store "stocking up for the week", only to get home, put everything away, and 2 days later your produce has already gone bad? Well I'm here to share some tips on how to properly store your food so that you can get maximum usage and life out of all of your precious goodies! Don't forget to wash and dry them really well before putting them away.


Fruits:
Apples: unwrapped in the fridge drawer; up to 3 weeks
Avocado (whole): refrigerator shelf: 4 days once ripe
Banana: counter top: 3 days once ripe
Berries: in plastic container: refrigerator drawer: 3-4 days
Citrus: refrigerator shelf: 2 weeks
Grapes: colander bowl: 1-2 weeks
Melon (whole): counter top: 5 days
Melon (cut or halved): wrapped in plastic: refrigerator shelf: 7-10 days
Peach/Plum: refrigerator shelf: 5 days
Pear: counter top: 4 days
Tomatoes: in plastic container: counter top: 5 days

Vegetables:
Asparagus: refrigerator shelf: in unsealed plastic bag: 4 days
Bell Pepper: plastic bag: refrigerator shelf: 1 week
Broccoli: refrigerator drawer: wrapped in plastic: 5 days
Cabbage: refrigerator drawer: wrapped in plastic: 2 weeks
Carrots: refrigerator drawer: plastic bag: 3 weeks
Cauliflower: refrigerator drawer: wrapped in plastic: 5 days
Celery: refrigerator drawer: wrapped in tinfoil: 2 weeks
Cucumber: refrigerator drawer: wrapped in plastic: 1 week
Garlic: dark area: unwrapped: 1-2 months
Lettuce: refrigerator drawer: plastic bag with paper towel: 5 days
Onion: dark pantry: unwrapped: 2 months
Onion (halved): plastic bag: refrigerator drawer: 5 days
Potatoes: dark pantry: paper bag: 1-2 months
Summer Squash: plastic bag: refrigerator shelf: 5 days
Winter Squash: dark pantry: unwrapped: 1 month

Tuesday, September 23, 2014

Tuesday Tip: Chicken Broth

Do you ever grab one of those seasoned cooked rotisserie chickens from the grocery store on your way home from work for a simple and delicious dinner? Guilty. But then afterwards, you usually just toss that nasty carcass in the trash and don't think twice about it. What if I told you that you could use that carcass for something other than a weird smell in your garbage can? Well you can. By simply adding water to the leftover chicken bones, you can make your own chicken broth. I couldn't tell you the last time that I bought chicken broth from the store. The canned versions can have as much as 750mg sodium, but by making your own you can control the amount of salt that goes in. So next time you think about throwing that chicken away, stop and make some chicken broth before you discard it!

Homemade Chicken Broth

Ingredients:
  • 1 chicken , meat removed form bones
  • water
  • salt and pepper (optional)
In a large soup pot, place chicken bones/carcass in the bottom. Cover with water, season with salt and pepper and bring to a boil. Reduce the heat to a simmer and allow to cook for 90 minutes on low.

Remove the pot from the heat and allow to cool to room temperature before placing in a airtight container in the fridge, or freezing in ice cubes trays and placing in a zip lock bag in the freezer for future use.

Tuesday, August 5, 2014

Tuesday Tip: Perfectly Crisp Bacon

Let's talk about bacon today. Because everything is better with bacon. But I hate it when you cook bacon in a skillet and it shrinks to about half of its original size, and it never seems to get crispy, just gets shorter and soggier.

After a friend of mine's husband (who is a butcher, so you know he knows all the tricks of the trade) suggested that I bake my bacon on a baking sheet on a rack, allowing it to cook from all sides, and remain straight as an arrow and crispy as all get out! So if you want the secret to perfectly cooked bacon, follow this simple tip.

Preheat your oven to 400 degrees F. Place a some tin foil on a baking sheet, then place a cooling rack or two on top of the foil. Lay your bacon cross the cooling racks and place into the oven. Bake for 20-30 minutes flipping halfway through, until your bacon reaches your desired crispiness.

Before

After

Tuesday, July 29, 2014

Tuesday Tip: Coffee Ice Cubes

I am really loving these Tuesday Tips. I love bringing something super simple, yet game-changing to the table. I have recently fell in love with Trader Joe's cold brewed coffee concentrate, which is perfect for hot summer days when I don't want to brew hot coffee and then add ice to it, which immediately waters it down and negates the whole purpose of a cool iced drink on a hot day. However, I couldn't manage to drink the whole container of the concentrate within the limits of the expiration date, so what did I do? Turned it into caffeinated ice cubes. By freezing the coffee concentrate and a little water, I have the perfect ice cubes to use in my coffee, and when they melt, I just get more coffee, instead of a watery, flavorless mess.


You don't have to use coffee concentrate by any means, by the way. You can simply brew black coffee and freeze in ice cubes trays, or go one step further and pre-cream (is that even a word?) them so that as the coffee melts, you also get more creamer to balance out the flavor.

Coffee Ice Cubes
  • 2 cups brewed coffee or coffee concentrate/water combination
Freeze the coffee into ice cube trays, and then keep in a large freezer zip lock bag for future use. 

Tuesday, July 22, 2014

Tuesday Tip: Simple Syrup

So many recipes these days call for simple syrup. Think lemonade, iced tea, and just about every cocktail on the planet. Now, you could easily go to the store and buy a $10+ bottle of pre-made simple syrup, or you could make your own for just pennies. All is it is water and sugar. That's it. Got 1 cup of water and 1 cup of sugar? You are in business my friend! Plus, once you've mastered the original simple syrup you can get creative by adding things like ginger, mint, lemon peel, or vanilla beans to create flavored simple syrups. The best part about using simple syrup over just plain sugar is that you don't get all of those sugar granules that collect in the bottom of your glass instead of sweetening your drink. For every teaspoon of granulated sugar that you would normally use to sweeten, use 1 1/2 teaspoons of the simple syrup.

Simple Syrup:
  • 1 cup water
  • 1 cup granulated sugar
In a medium sauce pan add the water and the sugar. Heat over medium heat; stirring often. Cook for 3-5 minutes until the sugar has completely dissolved. Allow to cool and store in an airtight container in the fridge for up to 2 weeks.

Tuesday, July 8, 2014

Tuesday Tip: Creating the Perfect Hot Dog

I hope you have all recovered from the 4th of July holiday weekend by now. I myself enjoyed a celebratory hot dog in honor of America's birthday, and I thought to myself, "Why have I never posted about hot dogs?". I mean, this is a hot dog themed blog, is it not?! So, here I am. In front of you today. Showing you the secret to the most flavorful hot dog. Plus it looks really cool.


Simply place a hot dog onto a skewer and with a sharp pairing knife, start at one end of the hot dog, press down firmly with the knife, and twirl the hot dog and skewer, until you have reached the other end of the hot dog, creating a swirl pattern.


Grill as you would on the grill and top with your favorite toppings (aka chopped onion and mustard in my house).


PS. Dont' forget to vote for me in the AZ Foothills Battle of the Blogs! Votes are UNLIMITED:

Tuesday, May 27, 2014

Tuesday Tip: Ingredient Substitutes

Do you ever start making a recipe and then as you go to grab a necessary ingredient you realize that you don't have it? Or, do you just want to slim down your favorite comfort food? Check out my list of easy ingredient swaps that are easy, affordable, and interchangeable!

Mayonnaise :: Plain Greek Yogurt or Avocado
Sour Cream :: Plain Greek Yogurt
Sugar (in baking) :: Applesauce (for every 1 cup of sugar called for, use 3/4 cup applesauce)
Butter or Oil (in baking) :: Mashed Bananas (1:1 ratio)
Eggs :: Chia Seeds (soak 1 tbsp. chia seeds in 1 cup of water for 15 minutes)
Breadcrumbs :: Rolled Oats
Cheese :: Nutritional Yeast
Syrup :: Pureed Fresh Fruit (just whirl in a food processor, presto!)
White Wine :: Chicken or Vegetable Broth (in sauces)
Cream :: Pureed Potatoes (in soups)
Coffee Creamer :: Almond Milk & Cinnamon (healthy & tasty!)
Tortillas :: Lettuce Cups
Rice :: Quinoa
Mashed Potatoes :: Mashed Cauliflower
Cornstarch (for thickening) :: All-Purpose Flour (1:2 ratio)
Lemon Juice :: Vinegar (1:1/2 ratio)
Buttermilk :: 1 tbsp. vinegar, then add enough milk to reach 1 cup, let sit 5 minutes
1 tbsp. Fresh Herbs :: 1 tsp. Dried Herbs
Cream Soup :: Homemade Recipe here


Tuesday, May 20, 2014

Tuesday Tip: How to Navigate the Grocery Store

A girlfriend of mine, and fellow blogger that I've mentioned a few times before, came to me with a suggestion for this week's Tuesday Tip; a grocery store tutorial. A how-to if you will. And I think it's a great subject to focus on this week. While picking out the right ingredients and making new recipes daily comes as first nature to me, that's not the case for everyone. And if you arm yourself with the right tools, you can leave the sometimes dreaded market with everything you need without breaking the bank.

We will use a recent trip to the store that I took with my boyfriend. While I normally go alone to the store; because a) I go multiple times a week and b) I take forever reading labels and smelling, squeezing, and picking through produce so no one really wants to be seen with me. But Andrew and I set out to stock up our house with the essentials, and he was prepared for an extensive bill. But when we got through the checkout and realized that we got an entire cart full of produce, dairy, eggs, pasta, deli meat, an array of cheeses and breads for only $65, he was amazed. Now $65 may sound like a lot to some of you, but this was about 2 weeks worth of groceries, which would equal 1-2 nights out at a restaurant for us. This is where I pat myself on the back. If "grocery shopping" was an endorsement on Linkedin, I would take the cake.

So here's my "map" to grocery shopping. First things first. I ALWAYS have a list prepared. I never go with the notion that I'll just pick up whatever looks good, because then I would be broke, and a lot of food would go to waste. Also, my favorite place to shop is Sprout's Farmer's Market, and they offer double ad Wednesday's, which makes for double the sale items, so I try to shop on those days. But I follow the same guidelines for any store.

As I enter the store, list in hand, I grab a basket or cart depending on the size of my list and head on in. I like to hit the outside border of the store, then make my way to the center where the produce is. I always head to the canned goods/baking section first where I stock up on beans (garbanzo for making hummus, black beans for Mexican dishes, and pinto/kidney for soups and/or chilis), as well as any baking supplies I am running low on (flour, sugar, oil). Then I head to the dairy section where I can usually find my favorite unsweetened almond milk on sale, as well as a dozen or two fresh eggs (hard-boiled eggs and breakfast sandwiches are a hot commodity in this house, not to mention baked goods).

Then I will head over to the meat counter where I am bound to get chicken breasts and ground turkey. If I have specific recipes that I know I am going to make that night/week, I will grab the necessary pork/beef/fish item, but never just because (unless it's a buy one get one free sale; I can't say no to those). Any wine stocking will happen at this time, which definitely requires a cart because you can never have too much wine; am I right?

Lastly I will finish up my trip in the produce section. I like to shop by what's in season, that way you know it's fresh and it's usually the cheapest because the stores have an abundance of them. If you don't know what is in season in your town, check out this handy-dandy map! My cart ratio is usually 3:1 produce:other food. I have a juicer that I use about 5 days a week, and I always incorporate fruits and veggies into every meal, so I tend to get a lot of them. Also, if things are in season and crazy cheap i.e. strawberries last week were $0.98, I will buy the max allotted amount by the store and juice them or freeze them for smoothies. Onions, cilantro, kale/spinach, cucumbers, lemons, and limes are always a must for me as I cook/juice with them daily.  And lastly I head to the check-out and make small talk with the cashiers.

I hope this has helped you to navigate the sometimes-scary-but-can-be-super-fun-if-you-let-it-be grocery store. And if you have a suggestion for another Tuesday Tip I would love to hear your ideas!

Tuesday, May 13, 2014

Tuesday Tip: Homemade Coffee Creamer

While I LOVE to indulge on sinful meals here and there, I really try not to eat a lot of processed foods. And if I do, I try to buy pre-packaged goods from healthy grocers like Trader Joe's, Sprouts, or Whole Foods, as well as reading the nutrition facts on the back. Knowledge is power people! So needless to say, grocery trips are usually done solo, because it's like a library to me. Reading, analyzing, and comparing products. It's like a game show. Remember Supermarket Sweep? It's like that, but instead of trying to fill my cart with the most expensive items, I am trying to fill my cart with the healthiest items at a minimal cost.

One thing I never really thought about was coffee creamer. And after looking at the back and seeing over a dozen chemicals that I could barely pronounce I decided there had to be a healthier way. And there is! By simply mixing 2 ingredients together (or 3 if you want a flavor), you have a healthy and great-tasting creamer that you can actually pronounce.

Homemade Coffee Creamer:
  • 2 cups unsweetened almond milk
  • 1 small can sweetened condensed milk
Optional add-ins to add flavor like 2 tsp. vanilla extract, cocoa powder, cinnamon, almond extract, the list goes on and on!

Tuesday, May 6, 2014

Tuesday Tip: How to Boil an Egg

Today, we are going back to basics. If you can boil water, you can boil an egg. P.S. Who else has seen Dodgeball? Because now all I can think of in my head is, "If you can dodge a wrench, you can dodge a ball!".

Hard-boiled eggs are great alone as a snack, or chopped up in salads, and they are definitely necessary to make deviled eggs, and the star of the show in egg salad sandwiches. So to be able to make any of these things you must go back to basics and, you guessed it, boil an egg!

To start, add your eggs to the bottom of a pot. Make sure that they are in a single layer, not piled on top of each other. Now, add just enough water to cover the eggs. My secret step to getting egg shells to peel off easily after they have cooled is to add a teaspoon of baking soda into the water before cooking. I also add a pinch of salt to help the boiling process since it increases the boiling point of the water.

Place the pot on the stove and turn the heat on high, bringing the water to a boil. Turn down to medium and cook, making sure that the water is still bubbling, for about 12 minutes for hard-boiled. You can also cook for less time, which results in a soft-boiled egg (a less firm yolk).

Remove from the heat and drain the water from the pot or remove the eggs with a slotted spoon. Carefully place the hard-boiled eggs in a large bowl and let them cool in the fridge.

To consume, just simply tap the egg on the counter or another hard surface to crack the shell, and peel it off. And there you have it. The perfect hard-boiled egg.

Tuesday, April 29, 2014

Tuesday Tip: The Secret to Hummus

Something that can usually be found in my fridge is a batch of homemade hummus. PlainJalapeƱo CilantroAvocado. Everything. I love it all. But it took me awhile to perfect my hummus recipes. And today I want to share that secret step with you.

The first step I always take when making homemade hummus is removing the outer shell from the chickpeas/garbanzo beans. This is a timely step, but oh so worth it in the end when you have a perfectly creamy texture instead of lumpy and grainy. 

Start by draining the chickpeas and reserving the drained liquid. Pour the beans and 1/2 cup water into a small sauce pan and heat over medium heat on the stove until they begin to simmer. Cook for another minute.

Remove from the heat and drain. Once the beans have cooled off enough to handle by hand, begin to lightly squeeze each individual bean, until the clear outer skin slides off. Discard the skins and keep the beans in a separate bowl. Continue to do this until all of the beans have been shed of their grainy shell. Then add them into the food processor as the recipe calls.

Trust me, this is a step I will never take for granted, and worth the extra 10 minutes. Just turn on a good play list on your iPod and go to town!


P.S. How hilarious is this sign that I found posted in Ikea yesterday?

Tuesday, March 18, 2014

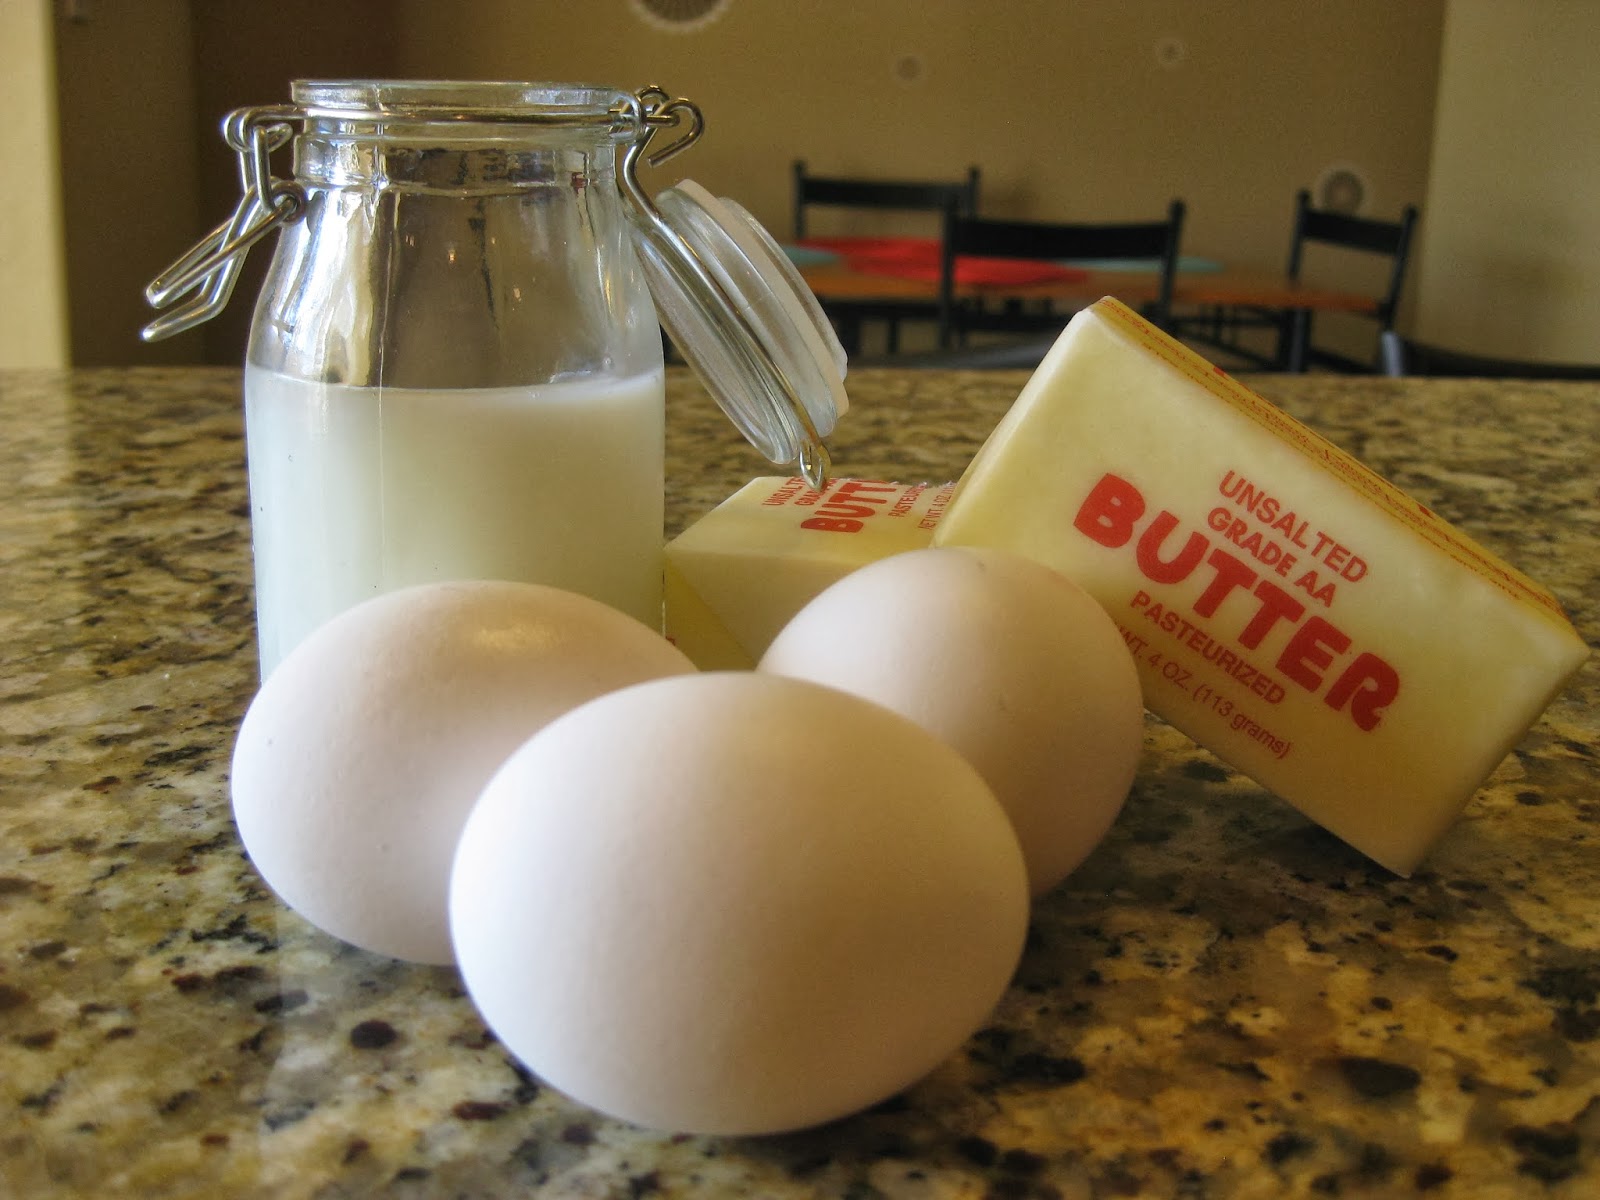
Tuesday Tip: Room Temperature Ingredients

Have you ever sought out to bake some delicious cookies, brownies, or a cake, and after incessantly following the directions step by step, then re-reading them to make sure you didn't miss something, you still couldn't figure out what went wrong, because your dessert came out resembling a dense pancake?

The answer my friends, is room temperature ingredients; specifically butter and eggs. Baking is a science, and in order for the dessert at hand to have that airy, flaky, light texture, we need to allow the eggs and butter to lift and raise. 

When eggs and butter are whipped together it creates air pockets that hold and actually expand during the baking process. So next time you want to whip up a delicious batch of chocolate chip cookies, remember this HDFB tip and get those eggs and butter to room temperature before you get started!

Tuesday, February 18, 2014

Tuesday Tip: Girl Scout Cookie Dessert Challenge

Tuesdays are starting something new here at HDFB. Something new and FUN. Tuesday Tips. Whether it be a kitchen tip, a life tip, or just a funny story with a sarcastic punchline at the end. Tuesdays are for tips.

For those of you who may not know, I am a girl scout troop leader for a group of the most fun-loving, pink-wearing, loud-giggling third and fourth-grade girl scouts here in Arizona. I've been with the same girls since they started kindergarten and every year they get more and more excited for cookie sales! This year we started cookie sales with a bang and didn't even bother with those silly pre-orders. We just set 'em loose and let them sell immediately.

That being said, restaurants around the valley of the sun have taken advantage of this and started a dessert competition using these delightful little treats that everyone craves around this time of year. Think of you favorite treasured cookie and then put it into a gourmet dessert made by a top chef. Take Samoa Turtle Cheesecake for example. So today's Tuesday Tip is to get out to your local restaurant and try their Girl Scout cookie desserts today!

See a list below of where you can find these scrumptious delights!

Thin Mint or Samoas Cheesecake
Samoa Bread Pudding
Tagalong Napoleon
Girl Scout Cookie Roll
Trefoil Jamboree Ice Cream Push Pop
Thin Mint Ice Cream Sandwich
Tagalong Shake Rattle and Roll
Samoa Turtle Cheesecake
Blueberry Cheesecake with Girl Scout Cookie Crust Gelato
Samoa Cookie Coconut Cream Pie in a Jar
Choco Thin Mint Ice Cream Sandwich
Savannah Smiles Ice Box Pie
Do-Si-Do Apple Pie
Tagalong Tiramisu


design + created by strawberriesnwine.com | 2014