photo home-34.png photo home-34.png photo home-34.png photo home-34.png photo home-34.png photo home-34.png photo home-34.png
Showing posts with label rice. Show all posts

Thursday, June 16, 2016

Easy Shrimp & Sausage Paella


With Father's Day coming up, I have decided that this dish is my father as a dinner entree. He's totally the guy that grabs every thing out of the fridge and makes something (usually) wonderful out of it. I can't say that his peanut-butter-turkey-pickle-mustard sandwich was on my top faves, but he can make a mean skillet! So here's to you Cowboy Dave, you kitchen rebel, you!


As a first-time paella maker, I've got to say that this is such a fun and easy dish to whip up for dinner. Not to mention all of the colors! I'm not always a huge rice fan (I''m more of a mashed potatoes girl myself), but the rice mixed in with all of the spicy flavors and textures going on in this paella is a definite winner. I used some mango jalapeno chicken sausages in this version, but feel free to use chorizo, or any sausage really. Mixing it up is half of the fun! Plus, you can make this serve just enough for 2 people, or triple the batch to feed a whole crew. Feel free to omit the hot sauce to make it kid-friendly, but I honestly think the hotter the better!


Easy Shrimp & Sausage Paella

Ingredients:
  • 1 small onion, chopped
  • 3 garlic cloves, minced
  • salt and pepper to taste
  • 2 tbsp. extra virgin olive oil
  • 1 tbsp. butter
  • 1 cup arborio rice
  • 1 14-oz. can diced tomatoes
  • 2 1/2 cups chicken or vegetable broth
  • 1 tbsp. paprika
  • 1 tsp. hot sauce
  • 2 chorizo sausages, sliced
  • 1 lb. peeled and deveined shrimp
  • 1 cup frozen peas
  • 1 tbsp. green onions, sliced
In a large saute pan or cast iron skillet, heat olive oil over medium-high heat. Add in the onion and garlic and saute until softened and fragrant, about 5-7 minutes. Add in the butter and allow to melt slightly before adding in the paprika and the rice. 

Toss the rice in the onion mixture to coat, then add in the hot sauce, tomatoes, and broth. Bring to a slight boil and cook , stirring occasionally until the rice has softened and most of the liquid has evaporated, about 15 minutes.

Now toss in the sliced sausages, the raw shrimp, and the frozen peas. Allow the shrimp to cook and turn pink and the peas to heat up before topping with green onions and serving hot in shallow bowls.  

Monday, March 14, 2016

Roasted Vegetable Risotto for 2


As we head into our fourth week of marriage, I am constantly reminded of what a supportive group of family and friends we have. Over the past year we were gifted many cookbooks, for newlyweds, cooking for 2, and just entertaining in general. Do they know us or what?! In fact, this whole week is dedicated to meals for 2. For all you newlyweds, married couples of years or even decades. This week is for you! I have been so happy these past couple of weeks, perusing through the pages, flagging my favorites, and just enjoying the calmness without all of the planning chaos. Though I do miss chatting with my vendors on a daily basis. Big shout out to you lovely group of talented friends!! Anyways, my first recipe was inspired by our newlywed cookbook, and a perfect excuse to use the last bit of fresh winter produce found in our local market! Roasted and served atop creamy risotto is the perfect weeknight meal. 


Roasted Vegetable Risotto

Roasted Vegetables:
  • 1 red beet, peeled
  • 1 golden beet, peeled
  • 4 large carrots, peeled
  • 1 large onion, peeled and halved, then quartered
  • 2 tbsp. olive oil
  • salt and pepper to taste
Risotto:
  • 1 tbsp. olive oil
  • 1/2 onion, chopped
  • 3/4 cup arborio rice
  • 1/2 cup dry white wine (like pinot grigio or sauvignon blanc)
  • 2 cups chicken broth
  • 1/4 tsp. freshly grated black pepper
  • 1/2 tsp. salt
  • 1/2 cup hot water
  • 1 tbsp. unsalted butter
  • 1/4 cup freshly grated parmesan cheese, plus more for garnish
  • freshly chopped chives for garnish

Place oven racks on top and bottom of the oven, then preheat oven to 400 degrees F. 

Cut all of the vegetables to equal sizes, about 3/4-inch pieces, then toss with olive oil, salt, and pepper. Place onto baking sheet and place on top rack of the oven. Roast for 1 hour.

Meanwhile, mix together the wine and broth into a bowl. Place the rice into a fine mesh sieve and soak in the broth mixture. This will help the starches from the rice stay in the dish, resulting in a creamier end product. 

Heat the olive oil in an oven-proof saute pan and cook the onions until soft, about 3 minutes. Strain, then add in the rice, and toss to coat in the oil. Add in the chicken broth/wine mixture, salt, and pepper, and bring to a boil. Cover and place on the bottom rack of the oven during the last 25 minutes of cooking.

Remove the roasted vegetables from the heat and carefully remove the pot of risotto. Add in the hot water, butter, and grated parmesan. Mix well.


Serve the roasted vegetables upon the risotto, garnish with chives and shaved parmesan.  

Tuesday, October 20, 2015

Roasted Acorn Squash "Wedge" with Brussels Sprout Wild Rice


The wedge salad never made any sense to me. You cut a large quarter out of a head of lettuce, and then drizzle the dressing on the top layer, along with the delicious bacon, tomato and bleu cheese toppings. But what happens when you get past that first layer? There no more good stuff to slather all over the lettuce. Just more boring lettuce. This is the wedge salad re-vamped, with enough good stuff to go around. Oh, and it's fall-inspired. Duh. 


Roasted Acorn Squash "Wedge" with Brussels Sprout Wild Rice
Makes 4

Ingredients:
  • 1 large acorn squash, quartered
  • 1 cup cooked wild rice
  • 1 tbsp. bacon grease (can substitute olive oil)
  • 1 cup brussels sprouts, ends trimmed, then quartered
  • 1-2 garlic cloves, minced
  • 1 apple, cored, then chopped
  • 1/4 cup dried cranberries
  • salt
Preheat oven to 375 degrees F. Spray baking sheet with non-stick cooking spray.

Sprinkle salt onto flesh of the quartered squash, then place flesh side down on baking sheet. Bake for 40-50 minutes until soft.

Meanwhile, heat oil in a medium saucepan over medium-high heat. Add in the quartered brussels and season with salt. Cook for 4-5 minutes before adding in the garlic, apples, cooked rice, and cranberries. Mix then cook for another 2 minutes.

Remove the cooked squash from the heat, place skin side down on a plate, and serve with the rice mixture on top.

Wednesday, September 23, 2015

Enchilada Stuffed Poblano Peppers

Is there anything more beautiful than a perfect poblano pepper? I seem to be drawn to them anytime I am at the farmer's market, especially when they are ripe, crisp, and a beautiful bright, yet deep green color at the same time. I have been known to roast my poblanos many a time {see here, here, and here}, but this time I decided to boil them, just until softened slightly, and then fill them with some classic Mexican flavors. This is my south of the border version of stuffed bell peppers. Plus, the saltiness from the cotija cheese brightens up all of the flavors. This recipe is my new go-to weeknight dinner with easy ingredients, easy prep, and a delicious result. 


Enchilada Stuffed Poblano Peppers

Ingredients:
  • 4 whole fresh poblano peppers
  • 1 tbsp. oil
  • 1 medium zucchini, chopped
  • 1 garlic clove, minced
  • 1/2 jalapeno, minced
  • 3 green onions, sliced
  • 1 1/2 cups cooked chicken breast, chopped
  • 1 cup wild rice, cooked according to directions
  • 1 can Mexicorn (corn, pepper mix)
  • salt and pepper to taste
  • 1 cup enchilada sauce
  • cotija cheese, crumbled for garnish
Bring 2 inches of water to a boil in large pot or a high-sided skillet. Boil the peppers for 6 minutes on each side, until softened.

Meanwhile, heat the oil over medium- high heat and add in the zucchini, garlic, jalapeno, and onions. Saute for 5 minutes, stirring occasionally.  Add in the cooked chicken, rice, and can of Mexicorn, stir to combine. Cook, stirring occasionally, until the peppers are done.

Remove the peppers from the pot, and turn off the heat for the filling. Carefully cut a slit down the center of each pepper, but do not cut all the way through, we just want to create a pocket to put our filling in. Scoop out the seeds from each pepper using a spoon, *careful* for steam may burn hands. 

Once the insides of the poblanos are cleaned out, fill each pepper with the chicken and rice filling. Top with warmed enchilada sauce and garnish with cotija.

Friday, June 26, 2015

Red Wine Risotto with Caramelized Mushrooms


I've basically gone insane. Like, who stands over a hot stove for 30+ minutes to make risotto (a typically fall/winter comfort food) in the dead heat of summer. Obviously the answer is me, but still, who does that? I was craving something hearty, maybe to pretend that it's not 114 degrees for the second week in a row. I love to ignore reality, clearly. So, in the middle of summer I in fact stood over my stove to make this incredibly rich risotto for you. And you know, what? It worked. We curled up on the couch to finish watching Season 3 OITNB (what kind of ending was that anyway?) and just vegged out. Now, I don't expect you to do the same until the temperatures drop at least below 70 degrees, but if you are feeling adventurous, or delusional like me, I promise it's worth it.


Red Wine Risotto with Caramelized Mushrooms 

Ingredients:
  • 2 tbsp. unsalted butter
  • 1 tbsp. olive oil
  • 1 cup button mushrooms, sliced
  • 3 garlic cloves
  • 1 1/4 cup arborio rice
  • 1 cup dry red wine
  • 3-4 cups vegetable stock
  • pinch of salt
  • 1/4 cup freshly grated parmesan cheese
In a medium skillet, heath 1 tbsp. of butter over medium heat and add in the sliced mushrooms, cook, stirring occasionally for 15 minutes until caramelized. remove from the heat once they are soft and fragrant.

Meanwhile, heat the remaining 1tbsp. butter and olive oil together in a medium to large pot over medium heat. Once they are melted together, add in the garlic and saute until fragrant, about 30 seconds. Add in the rice and stir, coating the rice in the butter and oil, stirring and toasting for 3-4 minutes. 

Add in the wine and stir every minute or so, if not constantly, until the wine has been absorbed into the rice. Once the wine is absorbed, add in the broth, 1 cup at a time, stirring until absorbed before adding more. After 3 cups have been added and absorbed, try a bite of rice to check the texture. If you would like them softer, add the remaining cup of broth.The entire process took me about 25 minutes until all of the broth was absorbed and the rice was tender.

After the rice has absorbed all of the liquid, add in the parmesan cheese and a pinch of salt. Stir, combining the cheese and serve hot, topped with the caramelized mushrooms.

Friday, May 1, 2015

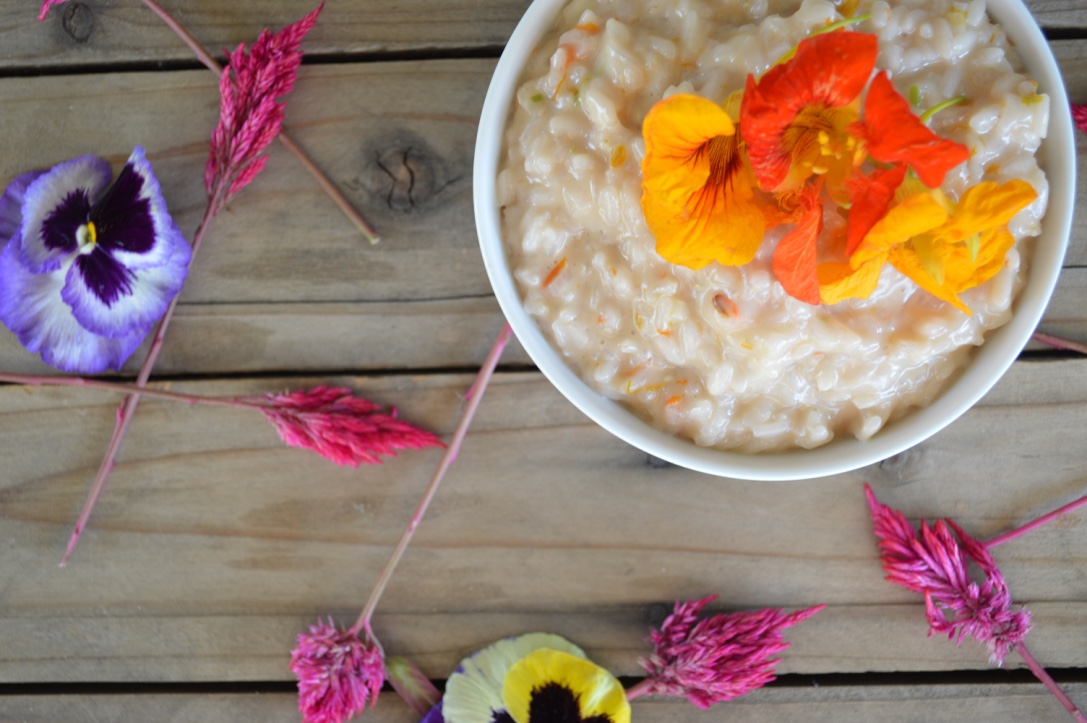
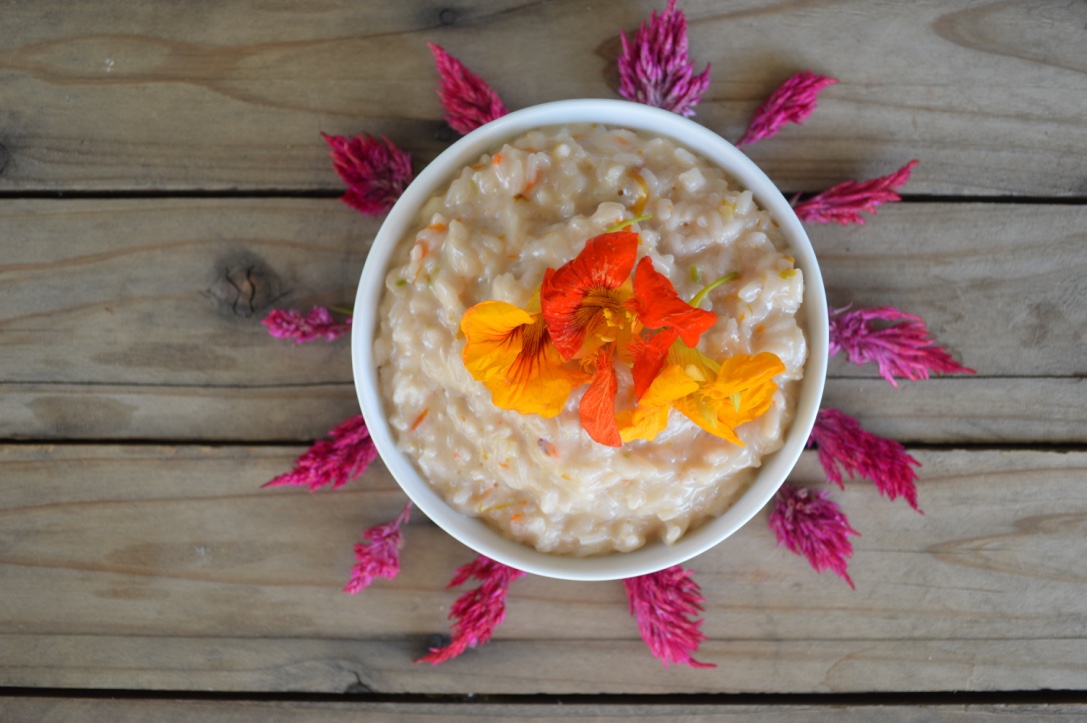
Nasturtium Risotto: an Edible Flower Collaboration


It's not every day that a local (and may I say bad-ass) florist asks you to be apart of something magical like an edible floral collaboration. But just like that, dreams do come true, and I was honored to have been asked to be a part of this amazing journey with Malori from Hoot & Holler.  I knew that I loved looking at her flower designs, but who knew that I would also love cooking with flowers? After researching dozens of edible flowers that Malori has at her disposal, I decided to go with nasturtium, whose stems, leaves, and flowers are all completely edible. The latin meaning of nasturtium is literally "nose twist", rightfully named so after its strong peppery taste. It's no wonder chefs love to cook with these blooms, not only because they add great flavor, but they also really know hot to dress up a plate! This risotto is creamy and rich from slow cooking it in butter and broth, but the nasturtium packs a punch of flavor that rivals all else. I couldn't be more excited to share this with you all and be sure to check out Hoot & Holler if you're ever in the need for a flower design or follow her adventures on instagram!


Nasturtium Risotto

Ingredients:
  • 4-5 cups vegetable broth
  • 6 tbsp. unsalted butter, separated
  • 1 shallot, minced
  • 1 1/2 cups arborio rice
  • 1/2 cup dry white wine (I used Pinot Gris)
  • 1 cup nasturtium flowers (chop 3/4 cup, reserve rest for garnish)
  • 1/2 cup freshly grated parmesan 
  • pinch of salt to taste

In a medium pot, keep the broth warm while you prep the rest of the risotto.

In a large soup pot, heat 4 tbsp. butter over medium heat. Add in the shallot once the butter is melted and saute for 2-3 minutes until softened. Pour in the rice and cook, stirring constantly for about 3 minutes, coating the rice with the butter.

Add in the white wine and cook another 2-3 minutes until the wine is absorbed, stirring occasionally. Once the wine has absorbed into the rice, ladle a spoonful of the warm broth into the rice. Stir constantly until the liquid has absorbed almost completely. Repeat adding the broth, stirring until absorbed over and over until only about 1 ladleful of broth remains. This should take around 20-25 minutes for the broth to be added and reduced down, allowing the rice to cook and soften.


When you add in the last ladle of broth, also add in the chopped nasturtium flowers. Continue cooking and stirring for about 5-6 minutes until the broth is almost completely absorbed. 

Remove from the heat and add in the remaining butter, 1 tbsp. at a time as needed to taste, as well as all of the parmesan, stirring until melted into the rice mixture. Serve immediately.

Monday, January 5, 2015

Creamy Chicken & Wild Rice Soup


After the two major vacations we took in December, our wallets and our stomach's were begging us to please get back into a healthy routine. Red eye flights, meals in airports, and the winter cold running rampant in Arizona were all catching up to us last week, so I decided to make a quick homemade batch of soup to calm our aching tummies and warm us up. This makes about 4 servings, so invite some friends over, or reheat this again for another night of traditional comforting soup. 

Creamy Chicken & Wild Rice Soup

Ingredients:
  • 1 tbsp. butter
  • 2 large carrots, chopped
  • 1/2 onion, chopped
  • 1 sprig thyme, stem removed
  • 1 sprig rosemary, stem removed and leaves chopped
  • 2/3 cup cooked wild rice
  • salt and pepper
  • 4 cups chicken broth
  • 1 large chicken breast, diced
  • 2/3 cup heavy cream

In a large soup pot heat the butter over medium-high heat. Toss in the carrots and onions and cook until softened, about 7 minutes. Add in the thyme, rosemary, and wild rice. Season with salt and pepper and stir to combine.

Pour in the chicken broth and bring to a low boil. Add in the chopped chicken breast and allow the chicken to cook in the broth; about 20 minutes. The chicken will be cooked through and extremely tender.

Pour in the cream, stir and cook, on a low boil, for another 10 minutes. Serve warm. Can keep in an airtight container in the fridge for up to 1 week or 3 months in the fridge.


*Tip: be sure to use butter, not olive oil like I did here, hence the oily pictures*

Wednesday, November 12, 2014

Creamy Wild Rice Bake with Crispy Shallots


With Thanksgiving right around the corner (OMG I know!!!!), I have been trying to create some traditional side dishes with non-traditional flair. This rice bake is a mixture between green bean casserole dressing to me. I actually paired this with salmon, but don't be surprised if this doesn't appear on the dinner table on Thanksgiving day. I love the saltiness of the fried shallots (almost as good as the fried onion straws from Sprouts) and the creaminess is just to die. Just talking about this is making me crave it for dinner again. Not mad about it. 


Creamy Wild Rice Bake with Crispy Shallots

Ingredients:
  • 3/4 cup wild rice
  • 1 3/4 cup chicken broth
  • 1 tbsp. butter
  • 1 garlic clove, minced
  • 1/2 tsp. dried thyme 
  • 1/2 tsp. ground nutmeg
  • 1 tbsp. flour
  • 2/3 cup whole milk
  • 1/2 bunch kale, stems removed and chopped
  • 1/4 cup + 2 tbsp. grated parmesan cheese
  • 1 tbsp. olive oil
  • 1 shallot, thinly sliced
  • salt and pepper to taste
  • 1/2 cup panko bread crumbs
  • non-stick cooking spray

Bring rice and water to a boil. Cover, lower to simmer, and cook for 45 minutes, until all of the liquid is absorbed.

In a large skillet, melt the butter and add the garlic, thyme, and nutmeg. Cook for a minute or two until fragrant. Sprinkle in the flour and whisk, cooking another minute. Continue to whisk as you pour in the milk, 1/2 at a time, whisking until thickened before adding the second half.

Once the cream sauce is thickened, add in the cooked rice and mix well. Add in the cooked kale and 1/4 cup parmesan cheese and mix again. Pour into a baking dish and top with the remaining cheese, the panko bread crumbs and the crispy shallots. 

Tuesday, November 4, 2014

Sweet Potato, Kale, and Chicken Wild Grain Rice Bowls


In the words of my boyfriend, "mashed potatoes are good and all, but man, I love a good sweet potato". So, in honor of making him the happiest I can, I have been trying to add sweet potatoes into our routine as much as I can. I might have even put some mashed sweet potato into a quesadilla
the other night. And by might, I mean that I definitely did. My inspiration for this recipe came from Iowa Girl Eats, and to make it an entree instead of a side dish, I added chopped chicken right into it. I have to say that the flavor of the wild grain rice mixture is delicious on its own, but the balsamic vinegar and honey mustard dressing just really adds some oomph to the dish. Plus, you can make a little extra and have some for lunch the next day! 


Sweet Potato, Kale, and Chicken Wild Grain Rice Bowls

Ingredients:
  • 3/4 cup wild grain rice
  • 1 1/4 cups chicken broth
  • 1/2 cup water
  • 1/2 large bunch of kale, stems removed, then chopped
  • 1 1/2 tbsp. unsalted butter
  • 2 tsp. brown sugar
  • 1 medium sweet potato, peeled, then chopped
  • 1 cup chopped roast chicken
  • 2 tbsp. pepitas for garnish
Dressing:
  • 2 tbsp. olive oil
  • 2 tbsp. balsamic vinegar
  • 1 tbsp. maple syrup
  • 1 tsp. dijon mustard
  • 2 garlic cloves, pressed 
  • salt and pepper to taste
In a soup pot, bring the chicken broth and the rice up to a boil. Cover and lower the heat to a simmer and cook until the liquid is completely absorbed, according to the box directions. 

Meanwhile, whisk together the dressing ingredients in a small bowl and set aside. 

In a large skillet, bring the water to a simmer and add in the kale. Cook for 2 minutes, then drain and set aside. Dry the skillet and add back to the stove. Melt the butter in the skillet, then add the brown sugar. Mix well before adding the chopped sweet potatoes. Cook for 8-10 minutes until the potatoes are slightly crispy on the outside, but softened on the inside. Turn off the heat. 

Add the rice, kale, and chopped chicken into the skillet with the cooked sweet potatoes. Pour in the dressing and mix well.


Sprinkle some pepitas on top and serve hot. 

Thursday, September 4, 2014

Miso Honey Glazed Salmon with Cilantro Lime Cucumber


I've been really branching out lately with the flavors that I am using in my kitchen. New house; new attitude I guess. Recent;y I have been trying my hand at adding miso flavors into fish and chicken dishes. So far my favorite things have been a miso ginger salad dressing, and this miso glazed salmon. This was the first dinner that Andrew I cooked in our new home, so it already holds a special place in my heart. The flavors are just light enough to lend themselves without overpowering the fresh salmon, and the tangy cucumber salad adds a cool crunch to the party. 


Cilantro Lime Cucumber

Ingredients:
  • 1 cucumber
  • 1 large garlic clove, minced
  • pinch of red pepper flakes
  • 1/2 jalapeno, minced
  • 1 lime, juiced
  • 2 tbsp. minced cilantro
  • 1 1/2 tbsp. olive oil
  • salt and pepper to taste
Miso Honey Glazed Salmon

Ingredients:
  • 1 tbsp. white miso
  • 1 tsp. sesame oil
  • 1 tsp. soy sauce
  • 2 tbsp. honey
  • 1 1/2 tbsp. rice vinegar
  • 1 garlic clove, minced
  • 1/4 tsp. ground ginger
  • 1 lb. salmon fillet
  • 1 tbsp. olive oil
  • 2 cups cooked white rice

To make the cilantro lime cucumber salad, thinly slice the cucumber lengthwise with a vegetable peeler or mandoline. In a medium bowl, whisk together the garlic, red pepper, jalapeƱo, lime juice, cilantro, olive oil, salt, and pepper. Add in the cucumber and toss to mix. Place in the fridge until ready to serve.

In a small bowl whisk together the white miso, sesame oil, soy sauce, honey, vinegar, garlic, and ginger. Place the salmon in a large freezer bag and pour the marinade of the salmon. Allow the fish to marinate for at least 30 minutes and up to 2 hours. 

After the salmon has marinated, preheat the olive oil in a large skillet over medium heat. Add the miso honey salmon, skin side down, and cover with a lid. Cook until the salmon is cooked through and flaky when pierced with a fork. 

When ready to serve, place rice on the bottom of the plate, top with the cucumber salad, and finally the cooked salmon.

Friday, August 22, 2014

Cashew Chicken


By now we know that I love re-creating Chinese takeout at home. I've done my take on General Tso's, Sesame Chicken, and Pad Thai. And today I carry on the torch and cover the classic cashew chicken. This weekend we will be moving into our new house, and with lots of moving comes less time for homemade meals and more likelihood of takeout and fast food. But when you have a recipe as simple as this, you can have "takeout" at home for a fraction of the cost and calories.


Cashew Chicken

Ingredients:
  • 2 tbsp. cornstarch
  • 6 tbsp. water
  • 1/3 cup low-sodium soy sauce
  • 1 tbsp. honey 
  • 1 tbsp. Sriracha
  • 1 tbsp. white wine vinegar
  • 1 tsp. sesame oil
  • 1 tbsp. olive oil
  • 4 garlic cloves
  • 1/2 cup unsalted cashews
  • 1 1/2 lbs. chicken breasts, chopped into 1-inch pieces
  • 1 cup water
  • 2 large carrots, sliced
  • 1 1/2 cups broccoli florets
  • 4 green onions, chopped
  • 2 cups cooked brown rice
In a medium bowl, whisk together the cornstarch and water. Then add in the soy sauce, honey, Sriracha, vinegar, and sesame oil. Set aside.

In a medium pot, add 1 cup water to the bottom, then steam the carrots and broccoli in a steam basket for 10 minutes, 

Meanwhile, in a large skillet or wok, preheat the olive oil over medium-high heat. Add in the garlic and cashews. Cook until fragrant and golden brown, about 2 minutes. Add in the chicken and cook, stirring until no longer pink, about 7 minutes. 

Drain the steamed carrots and broccoli and add them into the chicken. Lower heat to simmer and add in the sauce that you whisked together earlier and the whites of the green onions. Cook, stirring frequently until the sauce has thickened and the chicken and veggies are well coated.

To serve, place a large spoonful of brown rice onto a plate or into a bowl, top with the chicken and garnish with green onion tops.

Wednesday, April 23, 2014

Lightened Up General Tso's Chicken


Apparently this week is DIY Take-Out week so far on HDFB. Yesterday was pizza, now today is a healthy take on a classic Chinese dinner, General Tso's Chicken. It's no secret that I love to indulge on food, but sometimes I need to remember that I don't have the metabolism of a 3rd grader who runs around for hours a day and burns more calories that I take in. No, those days are over, and now I sit at a desk for 8 hours, my workout throughout the day is getting up to go to the restroom because I drink about 150 oz. of water, and then try to muster up the energy to go to the gym and make dinner every night. But hey! I love it and wouldn't do it any other way. Like I said, I like to indulge on my favorites, and this was I can enjoy some comforting Chinese take out without having to leave my house, or risk being seen in my sweatpants and wet hair at the pick-up counter!

Lightened Up General Tso's Chicken

Ingredients:

Marinade & Sauce
  • 1/2 cup hoisin sauce
  • 1/4 cup rice vinegar
  • 3 tbsp. tamari (gluten-free soy sauce)
  • 3 tbsp. brown sugar
  • 2 tbsp. corn starch
  • 1 1/2 cups low-sodium chicken broth
Chicken
  • 1 1/2 lbs. chicken breast, diced into 1-inch pieces
  • 2 eggs whites
  • 3 tbsp. corn starch
  • 1 1/2 tbsp. coconut oil
  • 2 green onions, chopped
  • 2 garlic cloves, minced
  • 1 tsp. fresh ginger, minced
  • 1 cup white rice, cooked according to package directions
In a medium bowl whisk together all of the marinade ingredients. Set aside.

In a large zip lock bag, add in the chopped chicken and 1/2 cup of the marinade/sauce. Seal tight and place into the fridge to marinate for 30 minutes.

Meanwhile, whisk the egg whites in a medium bowl until light and fluffy, then add corn starch. Remove chicken from the fridge and drain the excess marinade. Add the chicken to the egg white/starch mixture and toss well to coat.

Heat 1 tbsp. coconut oil over medium-high heat in large skillet. Cook the chicken for about 8 minutes, stirring occasionally, until completely cooked through.

 Remove chicken and set aside. In the same skillet, heat up the remaining coconut oil over medium heat and add in the green onion, garlic, and ginger. Cook for about 2 minutes, then add in the rest of the sauce mixture from earlier. Cook and stir constantly until thickened.

Wednesday, March 12, 2014

Eggplant Stir Fry


You know. I got to thinking the other day, as I was waltzing down each and every aisle at the grocery store, that the grocery store itself is in fact my happy place. I mean, obvi the kitchen is my number 1 love, but outside of the realms of my home, the grocery store is right up there. There are just so many things asking me to take them home, and you know what? I want to make them all happy. As I stroll down I may come to find new brand of cheese that is just begging to be made into a sandwich. Or I may find a new cleaning supply that quickly wipes away whatever #HDFB sized mess I have just made in the kitchen. But all I know is that I love the grocery store. What happens at the end of my grocery journey however, is not such a loving relationship. While the grocer loves to take my money, I usually cringe at the amount that I just spent. But I forget all about it once I get home and get to making my next culinary creation. That being said, what's your happy place? And please, feel free to make fun of my love of grocery shopping. 

Eggplant Stir Fry

Ingredients:
  • 2 tbsp. coconut oil
  • 2 tbsp. water
  • 1 large eggplant
  • 1 zucchini
  • 1 yellow squash
  • 1 red bell pepper
  • 1/2 onion, halved, then sliced
  • 2 garlic cloves, minced
  • 2 cups cooked white rice
Stir Fry Sauce
  • 1/2 cup soy sauce
  • 1 tbsp. creamy peanut butter
  • 1/2 tbsp. honey or molasses
  • 1 tsp. white vinegar
  • 1/8 tsp. garlic powder
  • 1 tsp. sesame oil
  • 10 drops sriracha, or hot sauce
  • pinch black pepper
  • 1/4 cup water
  • 1-2 tsp. corn starch
Begin by whisking all of the stir fry sauce ingredients together in a small bowl and setting aside.

Prepare the veggies by slicing them into evenly sized pieces. I prefer to cut mine lengthwise, making thick cut matchsticks (shaped like steak fries). In a large skillet or wok, heat up 1 tbsp. coconut oil over medium-high heat. Add in the eggplant and 1 tbsp. water. Partially cover and let the eggplant steam and cook, tossing occasionally. Watch the eggplant carefully so that it doesn't turn into mush. 

Once the eggplant has cooked and softened, about 3 minutes, remove the eggplant and set aside in a small bowl.

Add the rest of the oil and add in the zucchini, yellow squash, bell pepper, onion, and garlic. Toss to coat in oil and cook until softened, but still slightly crisp. 

Add back in the eggplant as well as the prepared stir fry sauce. Cook until all of the veggies are coated in the sauce.

To serve, place a bit of rice in the bottom of a bowl and top with the stir fry mixture. Serve hot. 

Friday, January 31, 2014

Stuffed Cabbage Casserole


As I prepare for one of the biggest party weekends (umm hello, Waste Management Open and Superbowl parties), I currently have a batch of macaroni in my fridge for baked mac and cheese balls, light and airy sugar cookies for my Valentine's blog posts, and some jumbo shrimp for a kale caesar salad. But before I descend into a weekend of splurging on beer, chips and dip, and endless amounts of cheesy fried goodness, I decided to post a healthy casserole dish, loaded with tomatoes, cabbage, and ground turkey (instead of beef). I love how different this casserole is from your mom's standard dish, and it makes for great leftovers!

Stuffed Cabbage Casserole
Recipe adapted from Skinnytaste.com

Ingredients:
Serves 5

  • 1/2 lb. ground turkey
  • 1 cup brown rice, cooked
  • 1 tbsp. olive oil, separated
  • 1/2 onion, chopped
  • 1/4 tsp. paprika
  • 1/4 tsp. garlic powder
  • salt and pepper to taste
  • 4 oz. can tomato sauce
  • 2/3 cup roasted grape tomatoes, chopped (or use 1/2 of a 14.5 oz. can of diced tomatoes)
  • 1/4 cup water
  • 1 small head of green cabbage, heart removed from center, and leaves roughly chopped into 1-inch pieces
  • 1/2 cup shredded mozzarella cheese

Preheat oven to 350 degrees F. 

In a large skillet preheat 1/2 tbsp. oil over medium heat. Add in onion, paprika, garlic powder, salt and pepper. Let cook until onions begin to soften, stirring occasionally, about 5 minutes. 

Add in ground turkey and let it brown, cooking it in with the onions. Break the turkey up with a wooden spoon as it cooks. Once the turkey has completely browned, add in the tomato sauce, diced tomatoes, and water. Let the mixture simmer for about 10 minutes, allowing it to thicken. Lastly, add in the cooked brown rice and mix well.


Meanwhile, in another large pan heat the other half of the oil over medium heat and add in the chopped cabbage. Cook until well wilted and soft, about 8 minutes, stirring occasionally. 


In a casserole/baking dish place half of the cooked cabbage on the bottom of the dish, spreading it out evenly. Then top with half of the turkey rice mixture. Repeat the cabbage layer and the turkey rice layer once more. Top with cheese. 


Cover with tin foil and bake for 40 minutes. Then remove the foil and bake for another 10-15 minutes until cheese is well melted and the casserole is hot all the way through. 

Remove and let cool for 5 minutes before serving.


design + created by strawberriesnwine.com | 2014